
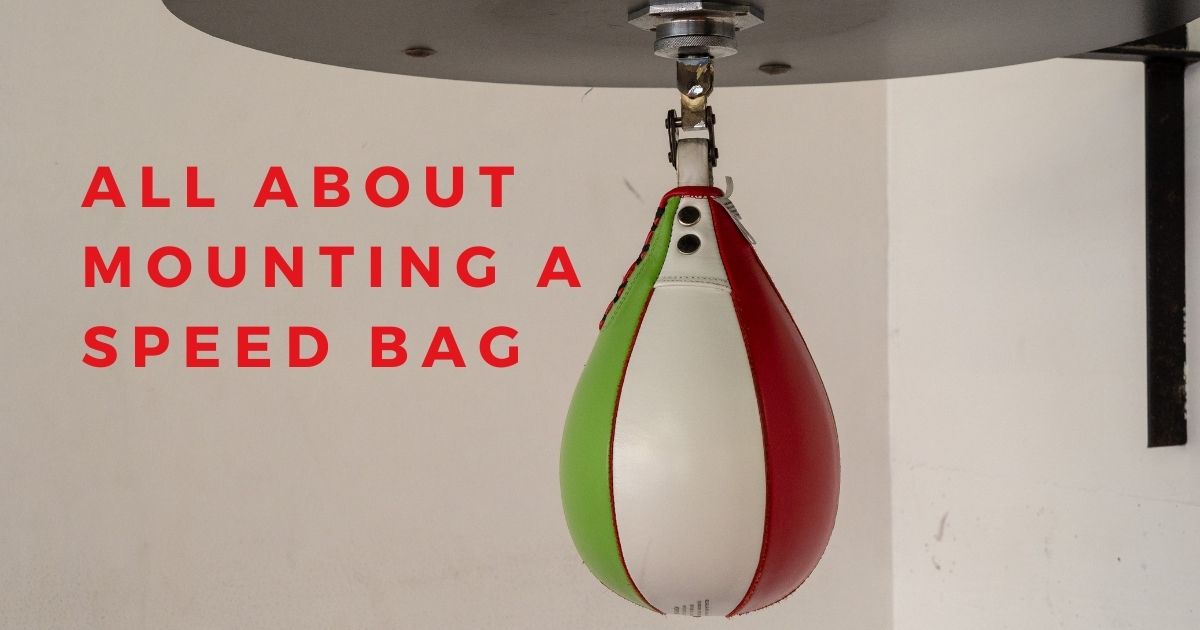
What is a Speed Bag?
Speed bags are small, lightweight punching bags that you can use to improve your stamina and hand-eye coordination. First, you need to have tips on mounting a speed bag. Though you can find these workout aids at many gyms, you can practice in privacy by installing a speed bag at home.
Along with the punching bag, you will need to use a speed bag to keep your boxing training on track.
How to Use a Speed Bag
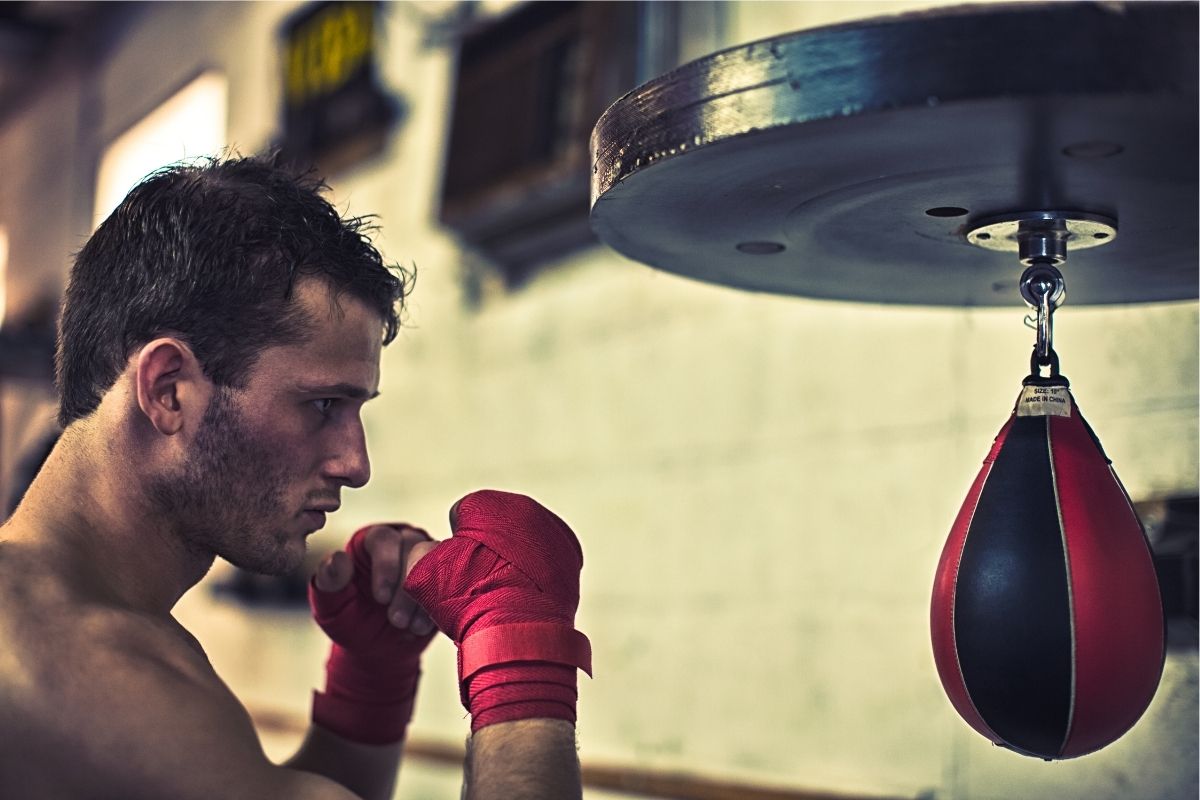
It is essential to know how to use the speed bag. Along with the punching bag, you will need to use a speed bag to keep your boxing training on track. The benefits of speed bags are worthy of note. A speed bag is a great way to increase your quickness and hand-eye coordination for boxers. In addition, it is an excellent cardio workout for people looking to achieve fitness goals.
Combine the two bag workouts, punching bag, and speed bag, and you will be ready to achieve your weight management goals in no time at all. In this post, you can learn how easy it is to install a speed bag in your home and how you can get the best use out of it.
How to Install a Speed Bag
You have three options when it comes to speed bag installation. You can purchase a ceiling mount, a wall mount, or a platform. You also need to consider the speed bag platform size when purchasing one.
Just put together the platform according to the provided instructions, and you are good to go. If you go with the other two options, then you can follow the steps given below;
Equipment Needed
- Marker/pen
- Drilling machine
- Ceiling/Wall mount
- Screws/bolts
- Screwdriver
- Wrench
- Level
Step 1: Pick the Right Space
You have to find the perfect spot to hang the speed bag. Basements usually have low ceilings making them ideal for ceiling mounts. Also, a corner of the basement will take you away from the hustle and bustle of the rest of the house. When you hang the bag, ensure that it is at eye height. If you do not have a basement, you can find a place for the wall mount inside your home.
Step 2: Get to Drilling
When you are measuring the height of the speed bag, the striking area should be in front of your forehead. Next, hold the mount to the wall or ceiling and mark the screw holes using a marker—drill holes in the marked places according to the screws or bolts with the mount.
Step 3: Attach the Mount
You can either use a screwdriver or wrench to secure the mount on the ceiling or wall. After you have tightened the required four to six screws on the mount, grab hold of it and check whether it wobbles or is uneven. Ensure the mount is even with the help of the level.
Step 4: Hang the Bag
Now it’s time to hang the bag on the mount. The hook will be at the center of the mount. The bag has a hook of its own. You can hang the bag using the hook and close it. The bag should be hanging straight and come to your eye or nose level at most.
Step 5: Test the Bag
Throw some test punches at the bag. It should fly towards the back, come straight back, and swing to the front. If the movement is smooth, then you have done a perfect job. If the bag wobbles, go above the list and see if you have missed something. You are free to use the speed bag now. Here is a refresher on how you can use the speed bag;
- Stand close to the bag, so you don’t have to extend your arms towards it.
- Don’t take your regular boxing stand. You don’t need to generate power here.
- Stand straight facing the speed bag.
- Hit the bag. It will bounce three times after every hit. So, wait and then hit it again.
- Hit the bag with an open hand first if you are a beginner.
- Hitting slowly with open palms will help you build a rhythm for your hits.
- Make sure that your hands are close to the bag so there is no buildup and you don’t make the bag too hard.
- Hit with one hand at a time. Follow a rhythm of two rights, then two lefts. Or 3 for each hand.
- With every hit, your hand should make a small circle.
- After about 10 minutes of open hand training, try it with closed fists.
- Wear inner gloves, hand wraps, or training gloves while training with the speed bag.
Benefits of a Speed Bag
If you’re considering adding a speed bag to your at-home workout setup, you have many benefits to look forward to. Below are some of the top reasons to add one to your routine.
- Boost Your Speed
- Improve Your Endurance
- Better Coordination
- Learn Pacing
- Increase Your Accuracy
How High Should a Speed Bag Be?
The height of the speed bag is critical. Find a high place on the wall to put your speed bag. Your wall should be tall enough to hang the unit above eye level without any issues; for the best results, place the unit between 5 and 1 ft (0.15 and 0.30 m) above your head.
Speed Bag Platforms
Speed bags are great for all types of fitness, from building strength and toning to improving your reflexes. Most kickboxing gyms use speed bags for training kicks, punches, and upper body movements. They are also helpful for cardio work.
However, to have a lightning-fast and correctly rebounding bag, a well-designed speed bag platform is inevitable. Without, a well-working platform bag may be too slow or moves undesirably.
You need a sturdy speed bag platform that’s easy to adjust, gives a good workout, and has a good design. This buying guide lists the best speed bag platforms providing a great user experience. These items are suitable for both home and gym usage. It is also essential to purchase a speed bag stand if you need it.
If you are a beginner, you should use the everlast adjustable speed bag platform. You can adjust the height of this product as well. With Evalast’s speed bag platform, you can use many different bags.
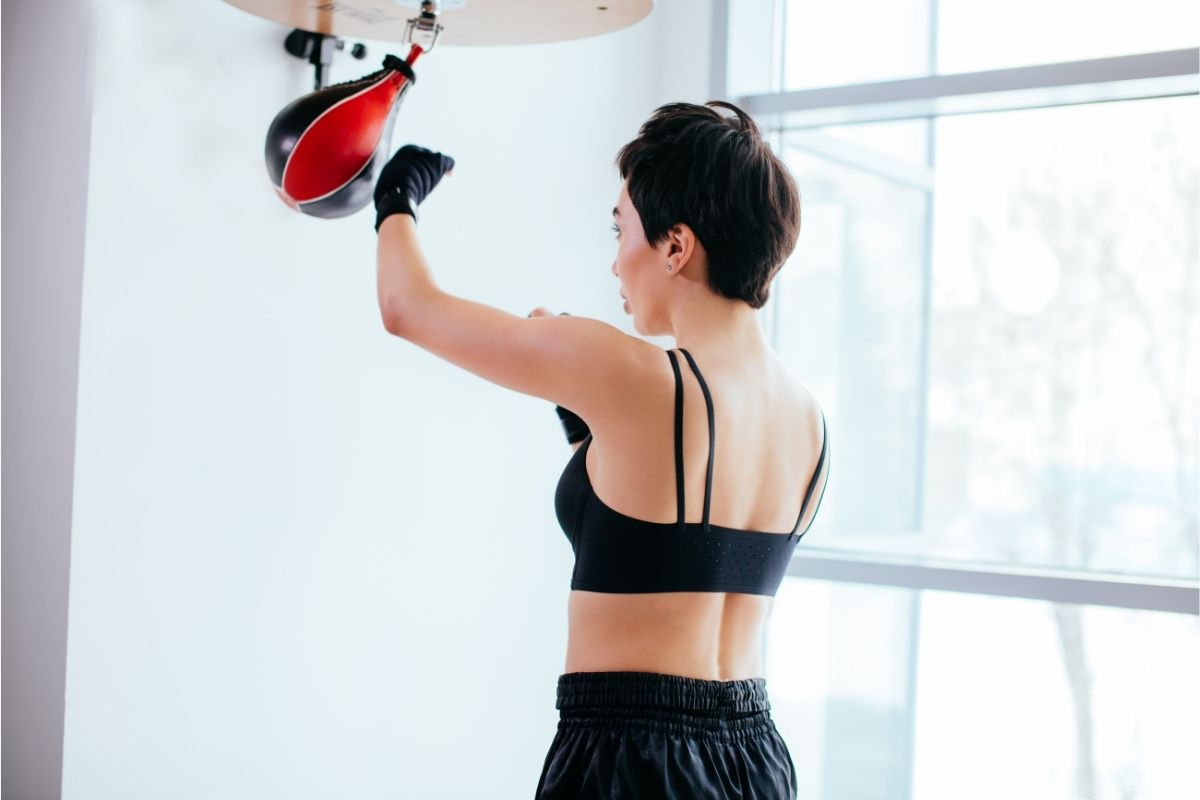
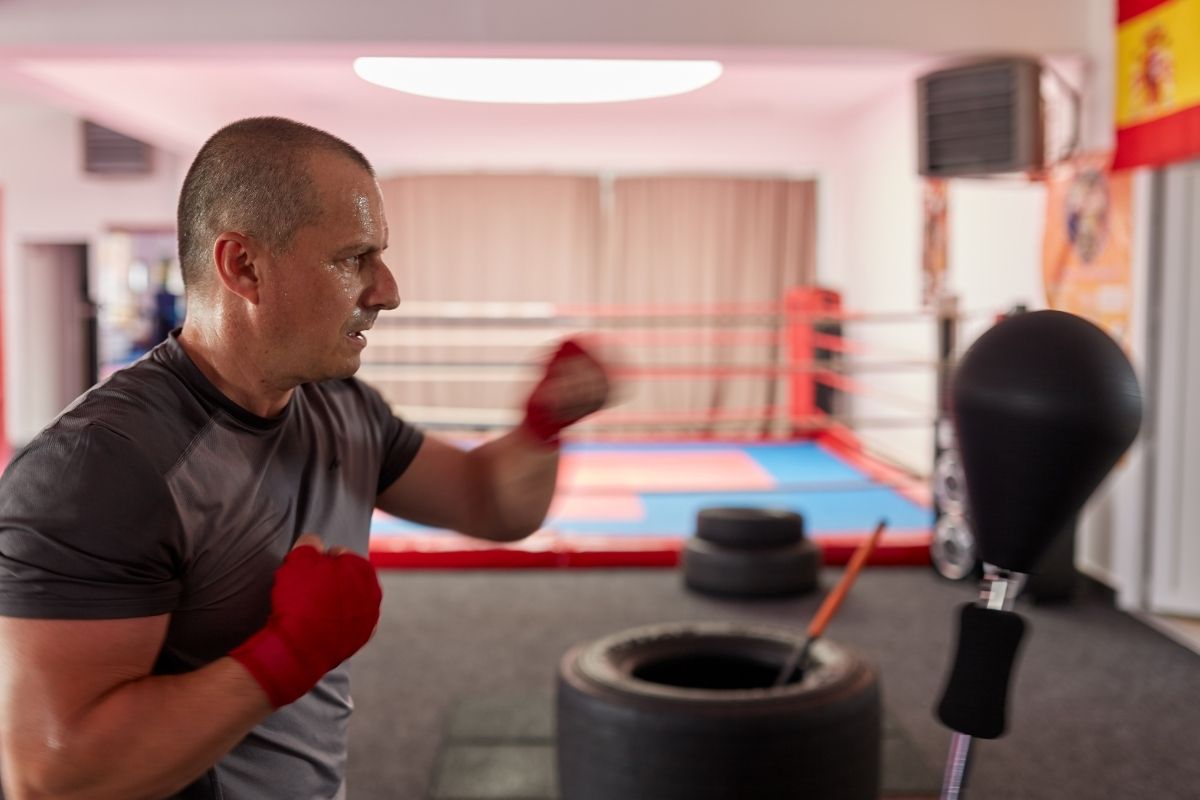
How to Punch a Speed Bag
Whether you’re training to be the next heavyweight boxing champion or just looking for a fun way to get fit, toned arms, the speed bag is an indispensable tool.
Working out with these small punching bags provides many benefits, including improved hand-eye coordination, quicker reflexes, increased arm strength and endurance, and an excellent cardiovascular workout.
It’s no wonder the speed bag has become such a big hit! Using the speed bag effectively can be difficult at first, but you can dazzle your friends and yourself with your lightning speed with practice and patience.
Step 1
Adjust the bag to the proper height. The bag’s belly (the fattest part) should be level with your mouth or chin. Many people hang their speed bags too high, resulting in unnecessary muscle strain and poor technique.
Step 2
Get in the “standard” speed bag stance. Face the bag with your feet apart at about shoulder width. From your feet to your head, your whole body should be facing the bag, and You should square up your shoulders with the bag.
You should be near enough to the bag that you don’t need to extend your arm more than a few inches to hit it, but far enough from it won’t hit you in the head on the rebound.
Step 3
Hold your fists up at chin level or just slightly below, and raise your elbows almost parallel to the ground. You should bend your arms at about 90 degrees, and both your upper arms and forearms should be nearly parallel to the ground.
Step 4
Execute a front circle punch. Extend one fist to punch the bag lightly. You should be able to extend your fist straight out or just slightly up to strike the belly of the bag in the front (the part facing you directly). You want to make contact with the bag with the side or heel of your fist—ideally, you will contact the bag with the side of your little finger near the first knuckle.
Step 5
Circle your fist down and back to the starting position, all in one smooth motion. Once you strike the bag, immediately circle your fist back. The circle should be small: large enough to bring your fist back into position near your chin.
Step 6
Count the bounces of the moving bag. After an odd number of rebounds, You can hit the bag again. For example, after striking forwards, the bag will rebound off of the back of the platform (rebound “1”).
When the bag swings back toward you, it will rebound off the platform again (rebound “2”), followed by the bag swinging back away from you and rebounding off the platform on the far side again (rebound “3”). As you become faster, it will be difficult to see the rebounds, but you will still be able to hear them.
Step 7
Strike the bag again as it’s tilted away from you. You can use the same hand or the other hand. Strike the bag after the third rebound, as the bag is returning toward you. You should make contact with the bag while it is still tilted away, ideally when you tilt it at about a 45-degree angle from the board.
This punch restarts your “1-2-3” count, and you can continue in this same cadence with as many punches as you like.
Step 8
Combine a straight punch with a front circle punch. Start in the same starting position as above, but drop your elbows a bit to be angled slightly toward the ground but still held away from your body. This will allow you to execute a right straight punch. Next, punch the belly of the bag, making contact with the front knuckles of your fist.
Punch “through” the bag so that your arm crosses your chest. Then, meet the bag on the third (or other odd-numbered) rebound with a circle punch that comes up, strikes the bag as it tilts away from you, and proceeds to carry your arm back to the starting position in one fluid motion.
This is the most basic speed bag combination, and you can constantly repeat it with one fist or alternate fists.
Step 9
Change the fist that is punching every two or three punches. After a circle, punch with one fist, follow with a straight punch of the other.
Step 10
Move your feet and swivel your hips. When performing combinations or alternating between fists, you should move your body, not just your arms. For example, suppose you do a straight punch–circle punch combination, alternating between the right and left fists.
When you throw your right straight punch, your right leg should come forward a bit, and your hips should swivel in the direction of the punch. As you return your fist to the starting position by throwing a right circle punch, your hips should swivel back, and your right foot should swivel back.
This puts you into position to throw your left straight punch, during which your left leg will move forward, etc.
How to Install a Speed Bag
The following are three different methods that you can use to install a speed bag easily.
Method 1: Hanging a Wall-Mounted Unit
Step 1
Purchase a wall-mounted speed bag unit. These units typically come with an inflatable speed bag, a bag mounting plate, and several sturdy poles you’ll use to attach it to the wall.
Try to find an adjustable unit so that you can raise or lower the bag mounting plate without tearing down the entire device. For example, look for wall-mounted speed bag units at fitness supply and sporting goods stores.
Step 2
Find a high place on the wall to put your speed bag. Look for a flat, unimpeded area of your wall where you can hang the speed bag unit from. Your wall should be tall enough to hang the unit above eye level without any issues; for the best results, place the unit between .5 and 1 ft (0.15 and 0.30 m) above your head.
Since you’ll be working out in this spot, make sure the area surrounding the wall is easily accessible and free of debris.
For example, if you’re 6 ft (1.8 m) tall, hang the unit so the mounting plate sits between 6.5 and 7 ft (2.0 and 2.1 m) off the ground. Though drywall may work fine for light speed bag units, hang heavy models from a wood or concrete wall.
Step 3
Make marks on the wall where your unit’s support bars will go. Next, lay your speed bag unit on the ground as fully assembled. Then, find the distance between your unit’s support bars using a tape measure.
After recording this information, make a pencil mark on the wall indicating where one of your support bars will go, then use your measurements to make additional marks representing the rest of the bars.
If you’re attaching your unit to drywall, use a stud finder to locate the thick wooden beams inside your wall. Then, make your marks over these spots to ensure the unit has enough support.
Step 4
Mount wood boards over the marked spots for additional support. Instead of attaching your speed bag unit to the wall itself, consider mounting a series of light lumber boards over the areas you marked. This will give your unit additional support, making it less likely to come off the wall. If necessary, recreate your original marks on top of the wooden boards.
Step 5
Attach your support bars to the wall. If necessary, pre-drill holes into your marked spots the same size as your support bars’ fasteners. Then, hold 1 of your support bars up to the wall and line it up over the marked spots. Use a level to make sure the bar is straight, then attach it to the wall using screws or similar fasteners. Repeat this process with each support bar.
Tug on the support bars with your fingers to ensure the support bars are secure. If they move, tighten the fasteners some more. Drywall anchors and similar fasteners should be more than sufficient for lighter models.
Step 6
Connect your speed bag mounting plate to the support bars. Lift your unit’s bag mounting plate and slide the attached beams into the newly installed support bars. Depending on your specific model, you may need to hold these beams with screws or similar fasteners. If your mounting plate does not slide correctly, you may need to realign the support bars.
Step 7
Hang your speed bag on the mounting plate’s swivel hook. If not already attached, screw the included swivel hook onto your unit’s mounting plate. Then, connect your speed bag’s top loop to the bottom of the swivel hook. If correctly assembled, the belly of your speed bag should sit at about eye level.
Method 2: Setting up a Free-Standing Unit
Step 1
Purchase a punching bag stand that includes a speed bag mount. Unfortunately, most stores do not sell dedicated speed bag stands, with rare exceptions. Instead, you’ll need to buy a traditional punching bag stand with a speed bag mounting plate and swivel hook.
You can find punching bag stands at sporting goods and fitness supply stores. Depending on their quality, most punching bags are affordable. For a cheaper solution, try building a bag stand at home.
Step 2
Assemble your stand by following the manufacturer’s instructions. Every punching bag stand is different, meaning there’s no single, unified setup procedure for all of them. Because of this, you’ll need to follow the manufacturer’s included instructions to make sure you assemble everything correctly.
Your unit’s instruction booklet should explain setting up the device’s support legs and speed bag mounting plate. If it does not, contact the manufacturer for assistance.
Step 3
Hang your speed bag on the stand at eye level. Once you assemble it fully, attach your speed bag’s top loop to the swivel hook located underneath the bag mounting plate. Next, adjust your stand so the bottom of the speed bag sits at about eye level. Unlike many wall-mounted speed bag units, almost all bag stands have built-in adjustment options.
Step 4
Place weights on the stand before use if necessary. Many consumer-level punching bag stands become top-heavy once you hook a bag onto them. Hold down the device’s legs with sandbags or similar weighty objects if your unit falls into this category. This will keep the stand from falling over during use.
Method 3: Using Your Speed Bag
Step 1
Hold your arms in front of the bag at all times. When using your speed bag, make sure to hold your arms up so that your fists are directly in front of the bag and your elbows are parallel to it. This will protect your face from injury, but it will also help you build endurance by forcing you to keep your arms up.
Step 2
Punch the bag using small, ovular motions. Do not use straight punches or jabs like you would in a fight to hit your speed bag properly. Instead, move your fists in small, ovular motions so that the furthest point of each oval hits the bag. Remember: speed bags are about rhythm and stamina, not power, so you don’t have to hit the bag hard.
When first starting out, hit the speed bag using the backside of your fist. Once you gain experience, feel free to switch to the front side.
Step 3
Hit the bag on specific, rhythmic beats. After punching the bag, count how many times it slaps against the mounting plate. Next, you should send your fist out again on an odd beat to create a solid fighting rhythm. When you first start practicing, try punching after every five slaps. Once you feel comfortable, try lowering the number to three slaps or even just one.
Conclusion
Speed bags are a great tool to have in your workout routine. They help increase speed, accuracy, and reflexes while giving your arms a workout. The good thing about them is that they’re relatively inexpensive, and you can mount them with no professional help.
You can typically mount speed bags on a “Speed Bag Platform.” A speed bag platform is a round board that a speed bag attaches to and bounces off when striking. It’s essential to get a good quality platform to minimize vibrations and improve the rebound, allowing you to practice rhythm and instinctual punching.
The speed bag is a standby among fighters looking to increase speed, coordination, timing, and rhythm. Beginners should use a giant speed bag and gradually progress to a smaller bag since the smaller bag moves faster because of its shorter rebound arch. Targeting speed requires smaller, faster, rhythmic punches, not more significant, brutal strikes.
Try a timed workout, where you attempt to increase the number of punches thrown in a predetermined time frame or by trying to execute a specific number of punches in a shorter period. The best rhythm for beginners is to go right-right-left-left. This means hitting twice with your right hand, then twice with your left hand, and repeating.
On the first hit, you use the front of your fist. On the second hit, you use the bottom of your fist. One of the most significant gains you will begin to see after using the speed bag is improving your hand-eye coordination. You have increased Punching Speed. Accuracy. Shoulder & Arm Strength. Improved Stamina. Mental Focus.